Inktense Pencils Tutorial – Bible Art Journaling Challenge Week 17

 (4 votes, average: 4.75 out of 5)
Hello Everyone! Welcome to week 17 of my Bible Art Journaling Challenge! I can say with certainty that, of the 16 previous challenges I have released, this one is by far, my very favorite. I’ve used Inktense Pencils to do a self portrait and provided you a longer video tutorial with more teaching too. Yay!
A self portrait in a Bible?!? Have I lost the plot here? Wait until you find out what I’m teaching about today. And before you run off thinking I’ve just set an insurmountable challenge, it’s not what you think actually! You’ll just have to watch the video and see for yourself!
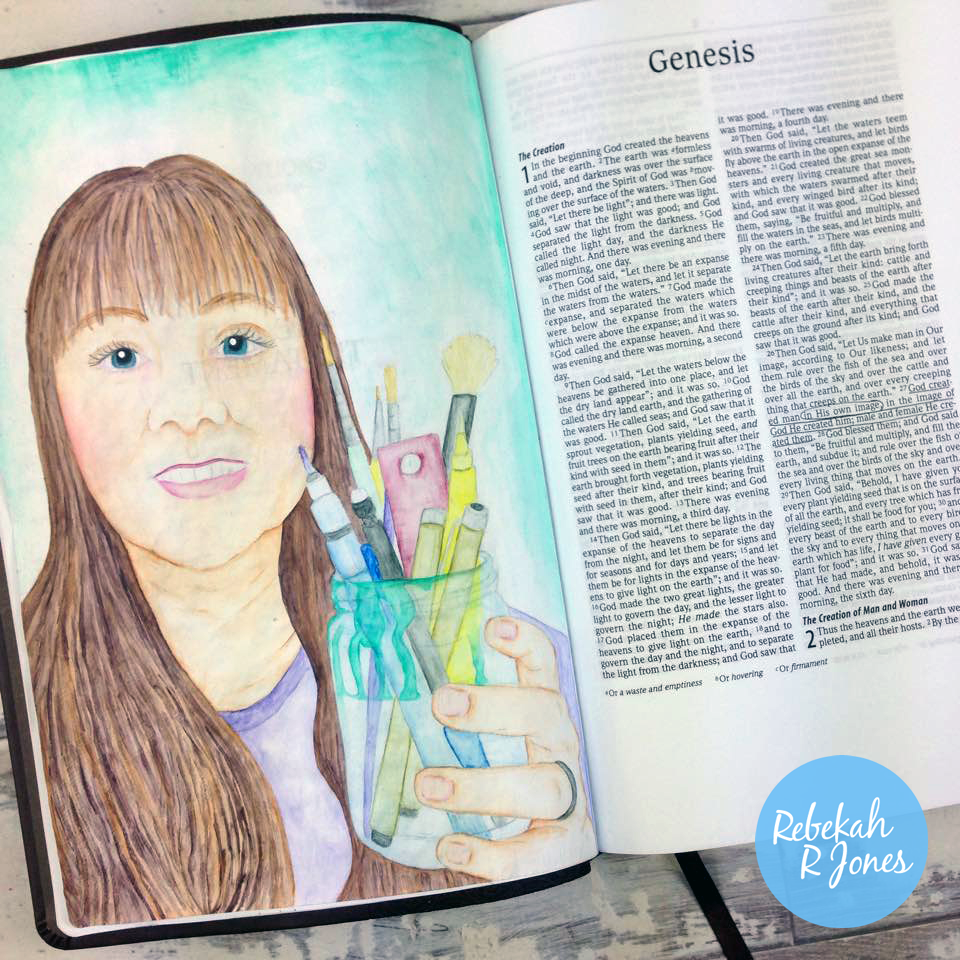
This week’s scripture is Genesis 1:27 which says,
“God created man in His own image, in the image of God He created him; male and female He created them.”
Understanding the verse
I often unpack the verse of the week, right here on my blog post. This week, I really want to leave good enough alone and ask you to watch my full video above to hear what I’ve shared on there. I’d really love to hear from you in the comments below about your thoughts on this topic.
You were made in God’s image and He loves what He created! We criticize God Himself, if we criticize ourselves. I want to encourage you to look at yourself in the mirror today and tell yourself that you are beautiful. You are worthwhile. You matter. You have an amazing future and great hope. God has joy for you and loves just how He made you. Nothing you can do would make Him love you less or more. Say it every day until you believe it. I promise it will lead to personal breakthrough.
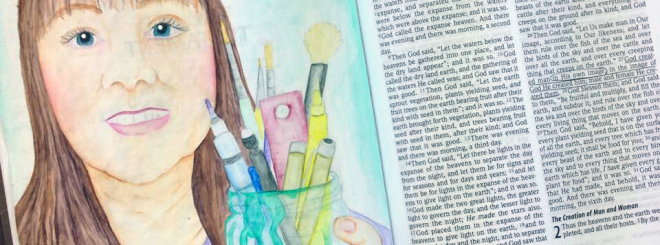
When you go to create this week, you do not need to paint a self-portrait, like I have for this challenge. Just choose to create something that expresses you best. What God created and loves about you. He puts desires in our heart and loves to see us enjoy life. I chose to create myself holding a jar full of art supplies. It expresses my love of creativity. God put that desire in me and loves that I enjoy it.
Focus on what you love about yourself. No self-criticism allowed. If you’re in a difficult season, dig back into another season. Remind yourself of what you used to love, which is still available to you once you get past this difficulty. The beauty of our darkest part of the night, is that it is the closest to morning. Remind yourself of what God loves about you and go on a journey of loving yourself well.
I’m not talking about pride. I’m talking about stopping any self-criticism. About recognizing perfectionism is an enemy of loving yourself well. About loving yourself as you love your neighbor. The thing is, if you don’t love yourself very much, you’re hardly going to be able to love your neighbor very well. You might be able to be kind and thoughtful. But deep love comes out of an overflow of knowing we are God’s kid and He LOVES what He created. He LOVES you! Are you convinced in the deepest part of yourself?
An official Bible art journaling technique
There are lots of tutorials on Inktense Pencils out there and I’ve even done another Inktense Pencils tutorial recently which you can also have a look at. You could also look at my video tutorial on illustrating a lion, which has some helpful tips too.
In my mind, there is really only one major difference from using Inktense Pencils on Bible pages, as opposed to other thicker papers or canvas. It is the same with watercolor. You must live by the rule that less is more. Less Inktense Pencils and less water.
If you’re familiar with watercolor, you’ll have learned about the wet-on-wet technique. You use a very wet brush to lightly soak the top of your surface with water. Then, before it dries, you load your
brush with color and brush it over the wet surface and the color flows freely wherever the water has been laid. This is a very normal practice in the world of watercolor painting.
I’ve been using a twist of this concept for weeks now, but finally have my head around how to explain it to you simply. I’d like to suggest we introduce this concept with a twist, as an official Bible art journaling technique. I’ll call it damp-on-damp.
There is also a technique in painting called dry brushing. This is where you load paint onto your brush while it is totally free of liquid, and apply the color. You get some fantastic brush strokes but this is largely off limits mainly for watercolorists unless you dilute the color before picking it up with your dry brush. Watercolor has to be diluted to work properly. Inktense Pencils and watercolor pencils are “diluted” by drawing less pigment onto the surface of the page in the first place.
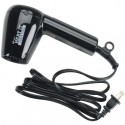
I’m suggesting we should always apply less color onto our Bible pages and less water too. Dampen your Bible page with an almost dry brush. How? Add water, then blot it on a paper towel, until it looks dry. The remaining water is all that is required for your delicate Bible pages. If you want more vibrant color, just buy yourself a heat tool like mine and get your Bible page totally dry before adding your next layer of color.
You can add SO MANY layers of color this way, without hurting your delicate Bible pages. Remember of course though, that I always recommend you protect your page before beginning so nothing bleeds through. My techniques for this help strengthen your thin Bible pages too. Read my blog post about my recommendations, etc., on that topic. I’m giving my secrets away today guys. 🙂
Inktense Pencils excitement!
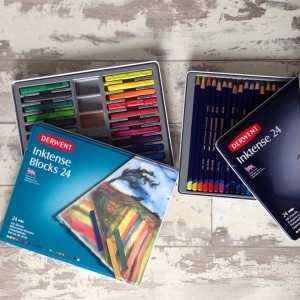
An Inktense Pencils side note for you… They and the Inktense Blocks sets happen to ALL be on a CRAZY SALE at the time of this post being released! Some sets are as much as 61% off! Yes, you read that right. If you want some, trust me and get whatever set you can afford. I’ve been watching them for months and this is a rare sale.
I just bought the full 72 set. Why the largest set? I fell in love with art more deeply because of watercolor pencils and these Inktense Pencils are even better in my mind. They are permanent once dry meaning you can layer instead of blend with them. I personally love that. I always buy a smaller set of an art supply to try out how I’ll like it. If I’ll get enough use out of it to warrant a larger range of colors, I then invest in more. I love my 24 colors and am very excited to use the full color range when they arrive!
Inktense Pencils technique
So, that excitement aside, what about this damp-on-damp technique has to do with Inktense Pencils? Tuck that damp-on-damp technique into the back of your mind, because I’ll be sharing more on it, in the weeks to come. As you understand the concept now, lets borrow from it for the Inktense Pencils. The same would apply to watercolor pencils too.
You need to color a very light amount of dry pigment onto the Bible page. Do this by not actually pressing on the page with your Inktense Pencils, but instead softly hold the pencil and let it glide across the page. You can get used to this and begin to introduce tiny bits of extra pressure (for more color), as you get the hang of it.
Inktense is called Inktense for a reason. That pigment is intense and vibrant. Less is more. Once you finish adding color and go to add water… think damp, not wet. Get your brush wet and then blot it on a paper towel, until it appears to be dry. That is the damp I’m talking about. If it still lets any bead of water onto your Bible page surface when you bend the bristles on its surface, the brush is wet instead of damp.
I LOVE my water brushes that have water already loaded in the handle of them but they are bad for Bible art journaling. You need to control that water amount and you’ll be mastering this all in no time if you haven’t already! No matter what size brush you use for Bible art journaling, be sure to only ever use a damp brush. You’ll have less page buckling like me and you’ll find your page is happier with you too. I hope all that makes sense and helps add some helpful techniques to master. You can do this! 🙂
Books I mentioned
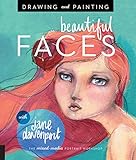
I mentioned in my video that there are two books I highly recommend. Drawing and Painting Beautiful Faces by Jane Davenport is a wonderful, full color book. It takes you through every step of making portraits, with various art supplies we all love. Her teaching style is excellent and her book is filled with step-by-step instructional photos with explanations. Regardless if you’re totally new to this or feel experienced, you can learn easily from her book. If you want to learn to draw faces, I cannot recommend this book enough.
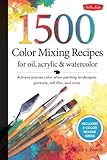
The second book is called 1500 Color Mixing Recipes for oil, acrylic & watercolor. This full color book is filled with the basics of color theory, mixing colors and also has a section dedicated to color mixing for portraits, among other topics. If you find yourself wondering which colors to use in your painting efforts, this book is a great reference and great read. It also comes with a bit of plastic to put over any given page to mix your color right on top of the page recipe to ensure you get the results you’ve seen them explain.
Your turn to create
I would love you to try any of the techniques I’ve shared in my process with you today if you’re interested in them. I also want you to feel free to gather inspiration for this scripture in other places and create right on your page if you want. I’m looking forward to seeing what you all Bible art journal for this weeks challenge! You can find answers to most any question you may have about the Bible Art Journaling Challenge over on my Challenge page found in the top navigation. It also has a full archive! Be sure to head over to our Facebook group and/or Google+ Community, to chat about this weeks Bible Art Journaling Challenge and get started on your own page!
Bible Art Journaling Supplies
As promised, here are the supplies I featured in this weeks video which you can click on to view or purchase. I hope it helps you find anything you may want to try out. I receive a small percentage of each purchase when anyone clicks on my art supply links, to go get supplies I use like you see below, or on my YouTube videos. This has no effect on you and makes a real difference for me! I am excited for you to get great deals on supplies anywhere, so you can join in on your budget. When you find deals which I’ve searched for and recommended below, I get supported. Thank you, I so appreciate your support which helps me provide these free tutorials for you!
Click images to view art supply details or to purchase.


If you have not done so yet, be sure to subscribe to my emails, so you can be notified when I release new challenges and other exciting creative things!
Don’t forget to share this with any friends you think might want to know about it. I will see you right here next week, for another Bible Art Journaling Challenge!
You are loved. x
UPDATE: I’ve had a couple people say they wanted to know what colors of Inktense Pencils I used in this tutorial video. I’m sorry I didn’t share in the beginning! Here is my response to them.
“…I used colors which are found in my 24 set. Willow and Baked Earth for skin. I added a touch of Mustard in a very few spots. Fuchsia for lips and cheeks once I’d finished the skin tones under those areas too. For the hair I started with Baked Earth (lightest), then added Willow (mid-tone) and finished with the darkest Bark color. For eyebrows I started with Baked Earth (lightest), then added Willow (mid-tone). Good to not draw attention to them and let them just be. For the eyes I started with Iris Blue and finished with a touch of Teal Green. The pupils and eye lashes are both Ink Black. Hope that helps!…”
Apr 28, 2015 @ 8:44 pm
Well said, Rebekah! I like the idea of having a self portrait in the beginning of the Bible of the artist actually doing the work…especially for those of us who want to make this a heritage piece to pass down. I’m nervous about doing it but thank it’s a good idea.
Apr 28, 2015 @ 10:23 pm
I was nervous too. But tracing is a great way to take most of the effort out of it. You can do do this! 🙂 And I could not agree more. It is a beautiful addition to a heritage piece. People will know not just the name of who owned the Bible. 🙂
Apr 28, 2015 @ 9:52 pm
Thank you for your wonderful video! I so enjoy your teachings each week. I’m learning a lot!
Apr 28, 2015 @ 10:23 pm
Thank you Janine. You are so sweet. I’m glad you’re enjoying them! 🙂
Apr 28, 2015 @ 10:49 pm
Rebekah….I have enjoyed all of your videos, but this one is truly spectacular! I enjoy watching your process and you are always soooo encouraging for us to try. Thanks so much for the time and energy that you put into making such a wonderful tutorial!
Apr 29, 2015 @ 12:37 pm
Thanks Jill. I’m glad you can feel my encouragement. You can do this! 🙂
Apr 29, 2015 @ 2:02 am
You are such a brave person to do the portrait of yourself, but at the same time I can see where this would elevate us to accept our worthiness of the love God gave us in his son Jesus Christ.
Apr 29, 2015 @ 12:39 pm
I think we all feel a self portrait is the hardest because we know our own self best. But truly, it is worth being objective and just painting what we see. You are right, it really helps us take time time appreciate God’s love for us. 🙂
Apr 29, 2015 @ 5:19 am
I am enjoying your blog so much this spring. I like the idea of your art work showing that the Bible is yours. That is another way of “writing your name”. My husband was in the U.S. Air Force and we lived in Cambridge, England from 1957-1960, one of our two favorite assignments and we loved to go back for visits and touring. I have wished I could be an artist since 1st grade, now I am seeing a tiny bit of ability—grandma Moses gives me hope! :)—and of course your videos do too.
Apr 29, 2015 @ 12:40 pm
That is great to hear! 🙂 And its true, a great way to “sign your name” in your Bible.
Apr 29, 2015 @ 8:02 am
LOVE this!!! What am I going to do? I want the full set of Faber-Castell Pitt pens AND now the Inktense watercolors. What to do? What to do? Thank you for your beautiful heart! I love watching your videos!
Apr 29, 2015 @ 12:41 pm
Oh, don’t ask me… I’d just say go out and get those Inktense! 🙂 They’re on sale right now so I’d get them first if you can. Great to be part of your journey Chelle.
Apr 30, 2015 @ 4:27 pm
HI Rebekah! I always look forward to what you have to share. God has given you a gift and passion and it is so inspiring to see you work it out! What better gift to have than teaching others the Bible and making it fun and beautiful!! 🙂
Love you dearly!
May 5, 2015 @ 10:48 pm
Oh Jaq. I love you so.
May 2, 2015 @ 6:15 pm
Very good tutorial and excellent Word. I will be dong this at a later time. I have penciled on my page across from beginning of Genesis “portrait of what God created you to be”. I will not be doing the actual self portrait (just cannot do that yet) but will be doing a collage of what God has created in me that I love and maybe am learning to love. Thanks
May 5, 2015 @ 10:48 pm
That is a great plan Candis! 🙂
Illuminating the Word | Spirit Dog Farm
May 21, 2015 @ 5:57 pm
[…] Up until recently and even for the faith-based groups, I was doing my art-journaling in anything from a legitimate journal to an 88¢ composition book from Wal-Mart (a purposeful choice as that’s what my youth group kids used to make their prayer journals). I had beautiful, blank pages to work with. Nana was resting peacefully in her grave. All was well. Then, all of a sudden, along came Rebekah R. Jones of the Bible Art Journaling Challenge, mentor extraordinaire, with her Week 17 project … “In His Image” (Genesis 1:27). […]
Mar 19, 2016 @ 7:05 pm
Rebekah I love your self portrait, this is one that is truly heard for me to even think about doing.
I’m praying that as I continue with the bible journaling I’ll become closer to God and see myself as He see me and not as the world see me.
I am still a work in progress
Mar 23, 2016 @ 3:22 am
I absolutely love your videos. I’m about to start bible journaling and have been watching your videos in preparation. One of the greatest things that you do that I LOVE, is putting a picture & link to your supplies! I know that takes a lot of extra time so thank you for all the effort you put in to your videos & blog. I’m sure God will bless your work and enrich your life for it. Thank you, thank you, God bless you!!
Jun 14, 2017 @ 6:52 pm
This is the second time I have seen this video and so much appreciate the devotional that goes with it. I am going to attempt to do this one soon in my bible and will post when I am done. I am so thankful for such a loving God who does not criticize me but does instead lovingly guide me toward him more and more each day as I give myself to Him. Thank you Rebecca.
Jun 9, 2019 @ 1:40 am
I love this! This is beautiful. Love the devotional and all your instruction on doing this.