Faber-Castell Gelatos and Chalk Pastel Brayering and Stenciling – Bible Art Journaling Challenge Week 27

Hello Everyone! It is week 27 of the Bible Art Journaling Challenge! Can you believe it?! That means I’ve now issued a full six months worth of challenges for you to have fun digging in to. What a ton of memories we’ve made together and what fun, that we’ve still got so much more to come!
Please don’t pressure yourself to go back and do all the challenges if you’re newer to me. Just do what speaks to you and hop in where you feel excited to join me. This isn’t about completing things. This is about being in God’s Word and loving every minute of it. The result? Hiding the Word in our heart and falling more in love with Jesus while splashing some color around.
To start off this second half of the year, I’ve created a challenge that has turned out to be fun, messy, bright and even a little hilarious. I made several mistakes while creating and I’ve shared them all and how I fixed things in the end. I even lost my voice a little at the conference I was at last week and it shows on the voice recording. Ha!
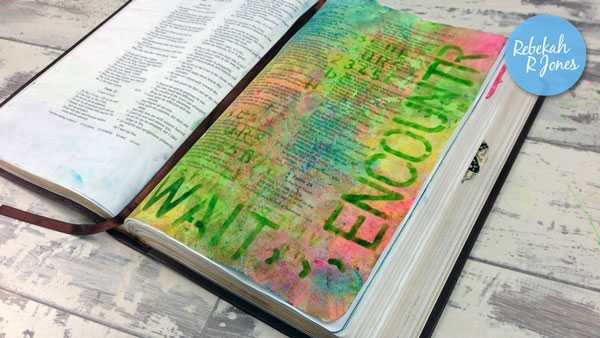
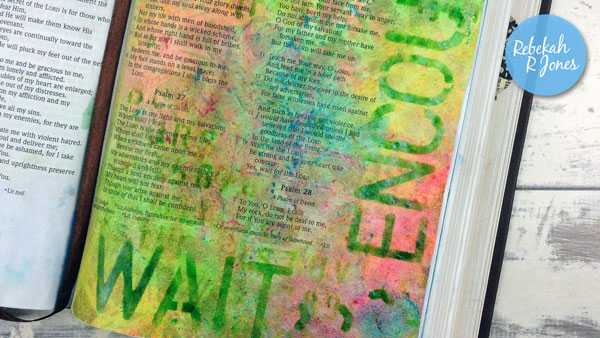
Think Faber-Castell Gelatos, chalk pastels, brayering, stenciling, marker spritzer… Tons of mixed media goodness gone a bit wild. I think you’ll enjoy the process with me! You’ll have to wait to the end of the video to see photos of the page, to really see how vibrant it turned out. I am really loving it! Lets dive in…
Gelatos and brayering
So, I used five Faber-Castell Gelatos from my set of 28 colors. I used Lime (green), Cotton Candy (blue), Bubble Gum (pink), Mango (orange) and Chocolate (brown). You could use another art supply you have, or get a smaller set of Gelatos to try out if you’re not sure about them yet.
As I mentioned on the video, you could also water down some matte acrylic paint or use less watered-down tubed watercolor, to get a similar effect. Be sure you do add water though as tubed watercolor should never be used straight out of the tube.
Though, watercolor would not layer as nicely since it sometimes reactivates when you add more color on top. I’d go for acrylic paint if I had to choose one of those two options. But why not try out new things and see what happens!? Play with your supplies and surprise yourself!
Prep any practice surface with the same stuff you’ll prep your Bible page with, and you’ll be working on the same surface you’ll eventually have in your Bible to work on. Don’t be fooled by a clear page prep. You no longer create on your Bible page but instead on what surface layer you created by prepping your Bible page! Hope that makes sense.
Alternatively, just use the scripture I’ve issued the challenge on and get creating from your own ideas. I’d love to see them! 🙂
A brayer is simply the roller you see in my video. They come in many sizes and roller materials. I love this little Ranger brayer because of its size. It works well with most of the smaller projects I work on. I have another brayer which is six inches wide that rarely has a usefulness to me for this type of random brayering, as you can imagine. The cool part about brayering is that you never can end up with the same thing twice. It always has a personal touch.
If you’ve never done brayering before, I’d recommend you try it out somewhere outside your Bible first, to get used to how hard or soft to press while rolling and how thick or thin you want your paint/pigment/ink or whatever, to be. If you roll onto a surface which has been prepped with a gesso (or clear gesso as I did), you’ll find the texture effects will look different than if you roll on to a non-prepped surface.
For Bible art, I always would recommend you prep first for brayering because you’ll use more liquid which means more chance of bleeding through to the back side of your page without that page prep. But give the whole brayering thing a try in various ways with various products on various surfaces and see what you love most. Then, start doing it in your Bible! 🙂
I personally find I do not need to add pressure at all with my brayer. I simply hold and roll, letting the brayers own weight be enough pressure to push the color around the surface. I roll once to get color in an area. Then roll on the edges I created, to remove the hard edges of color and finally sort of tap and sort of roll in various spots in that area and pick up in random spots to leave interesting marks.
Practice and see what you like. It’s just rolling color on to a surface and it is as many creatives will attest to… fairly addicting. Haha You must try it to understand…
You’ll notice in my video that I worked some Faber-Castell Gelatos color into the makeup sponge wedges to then smear into my page through the clockworks stencil using that circular motion. I use a different sponge for each color and save them to use again and again. While you can’t really see much of that design in the final creative work, it did add dimension.
Mixed media works best I think, when you just keep adding layers upon layers of color. It builds up interesting things to look at and try to understand. It draws you in to figure out more. In order for it to work, you have to overcome being afraid of covering something you love, to creating something with depth.
It’s okay to sacrifice something beautiful to create something more beautiful. And if you don’t love how its looking? That is okay! Trust yourself! It’s just time to add more layers of color! The key is to not panic and just keep going with super transparent color so it all shows what is behind each layer.
Keep adding layers and when you just love it, stop. Right then. 🙂 But don’t stop on the first layer, trust yourself. You can do this.
I’m giving away my secrets now. 😉 I am not one who cares to keep creative secrets. You can totally do this with me! 🙂
Stenciling
Just a quick note about stencils… When choosing a pattern design that has lines and angles, (as opposed to circular or flowing movement), try to ensure those lines and angles are pointed up and down or sideways, rather than partly sideways. The brain just takes in the information easier and it makes for a piece which people are more drawn in to, because they can process the creative information easier. Just a little tip.
And if you don’t understand what I mean? Don’t worry about it. Just create. Let creativity flow out of you and in time you will have to get better and better, simply because you’ll be more familiar with what you are doing. It’s a natural part of learning. Just enjoy it.
I used a few different stencils. The Tim Holtz ones are easily found in many places and I’ve linked them below. The square one I used, is from one of my favorite UK companies and is not yet available in the US sadly. I’ve linked it for my UK friends. If you are in the US, the company themselves have told me they will ship directly and they can be emailed to place an order. They are small and trustworthy. I LOVE their stencils and masks. Maybe someday I can get them into the US for them!
The two alphabet stencils are just basic ones. I’ve no idea where I got mine but they or something similar should be at most local art or craft supply shops.
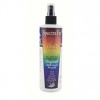
Distress marker spritzer tool
The key to making the marker spritzer work properly is to make sure your marker tip is all the way in front of the nozzle which will blow air at it.
A word to the wise, I would not recommend the marker spritzer to those of you who may be low on energy or have problems with your muscles etc. This does take firm and quick squeezing of the spritzer bulb which I would not have been able to do while I was bed-ridden and lacking energy. Now I am well, it is perfectly fine and I enjoy giving myself a mini workout for the sake of having a really cool effect on the page. Super fun!
Tim Holtz brought the Distress Marker Spritzer Tool back to the market and I think this video here is worth sharing with you so you can learn from him, all about the tool and its uses and tips. I bought one after watching this video last year and have really enjoyed it!
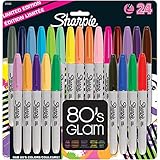
For my challenge today, I used the Lime Green Sharpie from the colorful set I’ve linked to below. I use my sharpies with my marker spritzer more than I do by themselves. Since they are permanent, they help me not lose what I’ve put down when I go to add more mixed media layers.
Micro Glaze
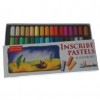
So, you watched me have a little disaster with the Micro Glaze. Embarrassing. I actually knew better and was feeling tired and experimental. Usually I test things out first and I didn’t. Ha. But great for you to see I am human and we can all fix our creative mistakes with a little thinking. I just dried up my surface by adding some chalk pastels by Inscribe.
I think I will still try this again and next time I will try to add an even thinner layer of the Micro Glaze to see if it will allow me to add a gel medium on top of it without resisting its adhesive nature. I’ll just try it outside my Bible first.
If you follow my facebook page, you know I recently recommended Micro Glaze for waterproofing/sealing your watercolor. And now the disaster in the Bible. Haha So I want you to see how wonderful this stuff is and the possibilities it has.
Here is a video where Tim Holtz shares how it works and explains about how he has collaborated with the makers of the Micro Glaze, to bring it to his Distress product line. You’ll notice I’ve linked below to Micro Glaze which is the cheaper option for you and if it is running low on stock, search for his product which is the same, if you like. It may need some thinking to be suitable for Bible art but it is a crafters dreamy product in my opinion. So here is Tim Holtz…
Lastly on the topic of the Micro Glaze, here is Vicky Papaioannou from YouTube whose art journal videos are always super inspiring to learn from. She shows how she used Micro Glaze and I love what it made possible for her. It basically makes watercolor, a possibility for mixed media layering in new ways! Plus, I just love her creativity and don’t mind an excuse to share it with you! 🙂
This weeks scripture
Psalm 27:14 in my NASB Note-Taker’s Bible says…
Wait for the LORD; Be strong and let your heart take courage; Yes, wait for the LORD.
I talked a bit in length about this in my video today and I want to leave it short here for this week. The message is simple to me.
David wrote Psalm 27 and gives us an example – a roadmap if you will – of how to wait on God. Read it for yourself and see what stands out to you. I have found that God always rewards us with encountering Him, when we wait on Him. We do our part, He meets us in that place and it is usually a bit messy and a colorful explosion of His goodness. How beautiful!
But what does it mean to you? By all means create along with me if you like. But if you feel this set of scriptures means something totally different to you, create from that place in your heart. I can’t wait to see what you do and hear about it!
Today’s Bible art journaling supplies
As promised, here are the supplies I featured in this weeks video which you can click on to view or purchase. I hope it helps you find anything you may want to try out. I receive a small percentage of each purchase when anyone clicks on my art supply links, to go get supplies I use like you see below, or on my YouTube videos. This has no effect on you and makes a real difference for me!
I am excited for you to get great deals on supplies anywhere, so you can join in on your budget. When you find deals which I’ve searched for and recommended below, I get supported. Thank you, I so appreciate your support which helps me provide these free tutorials for you!
Be sure to also view my Bible Art Supplies page for Bibles, art journals and other art supplies I recommend for Bible art journaling.
Click images to view art supply details or to purchase.


Bibles ideal for Bible art journaling
There are several wide-margin Bibles I’ve seen recommended for art journaling, including large print versions. I’ve created a linked collection here to make your choice easier when looking for a Bible to art journal in. If you click on any of the Bibles, you will often be able to look inside to see the pages for yourself before purchasing!
I really like my ESV Journaling Bible with faint lines in the 2 inch wide margin and cream paper color. I love my imitation leather, NASB Note-Taker’s Bible, which is free of lines in the wide and bottom margin with white paper. All give extra room for creativity.
You can also join in with a Bible you already have, or even an art journal like the art journals I recommend.
Click images to view art supply details or to purchase.
 |
 |
 |
 |
 |
 |
 |
 |
 |
 |
 |
 |
 |
 |
 |
 |
 |
 |
 |
 |
 |
 |
Your turn to create!
I would love you to try any of the techniques I’ve shared in my process with you today if you’re interested in them. I also want you to feel free to gather inspiration for this scripture in other places and create right on your page if you want. I’m looking forward to seeing what you Bible art journal for this weeks challenge!
You can find answers to most any question you may have about the Bible Art Journaling Challenge over on my Challenge page found in the top navigation. It also has a full archive! Be sure to head over to our Facebook group and/or Google+ Community, to chat about this weeks Bible Art Journaling Challenge and get started on your own page!
If you have not done so yet, be sure to join my newsletter on the right-hand side of this page, so you can be notified when I release new Challenges and other exciting creative things. And, don’t forget to share this with any friends you think might want to know about it.
You are loved. x
Scripture quotations taken from the NASB.

 (3 votes, average: 4.33 out of 5)
My Favorite Bible Journaling Tool! | Divine Creative Love
Mar 20, 2019 @ 7:55 pm
[…] However, this tool is definitely special, in it’s unique function and ability to create totally awesome effects with very little effort. (I originally was introduced to this gadget in one of Rebekah R Jones’ Bible journaling tutorials, which you can see here.) […]
Jun 14, 2019 @ 10:03 pm
What a fun lesson! That marker spritzer is pretty cool. Don’t have one of those though.